
Note: Using this tool to invite people from several past events may result in multiple emails to your supporters. When inviting from more than one past event, we recommend importing a .CSV file and using Event Tools > Email Invitation List instead of using the Bulk Actions dropdown.
Attendance - send an Invitation to past guests or hosts.
- Make sure your current event is set up, open, and ready to go.
- Switch to your past event and go to Manage Registrants.
- Check off the people whom you'd like to invite.
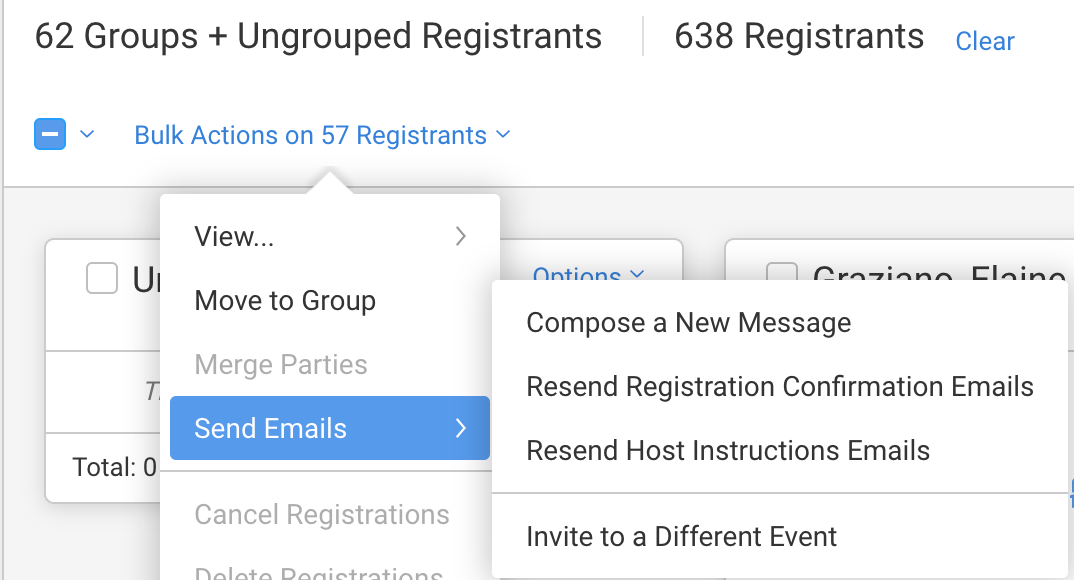
- Click All Groups on the left (so that all the groups show in the middle of the canvas) and then use the checkbox next to Bulk Actions to select All Registrants, Hosts, or Guests.
- You can also check everyone one in a group by clicking the checkbox to the left of the group's name, or you can check individual people.
- Click the Bulk Actions Link and choose Send Emails.
- Choose Invite to a Different Event.
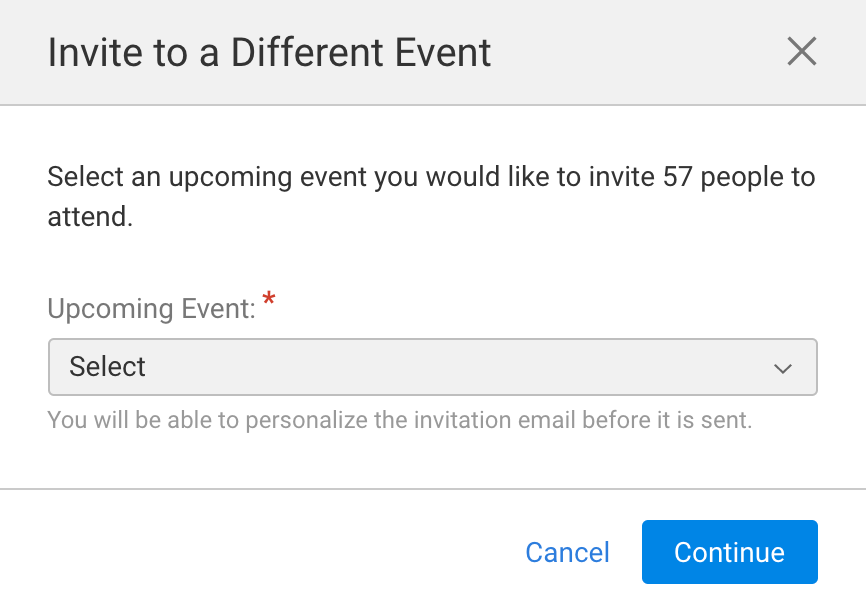
- In the modal that pops up, choose the current event from the list of events. This important step tells the system which banner and templates to use.
- You'll be able to add a personalized note before it is sent.
- Preview the email to make sure you see the upcoming event details and graphics. Changes to your event details, such as date, time, and contact information can be made in Event Setup > Event Details. Other changes can be made by clicking the Customize Email Template link to go to the Invitation Template. If your personalized message does not appear, make sure that your %InviteNote% variable is on the top of your email template for the new event.
Peer-to-Peer - There are two ways to send an invitation to past Walkers in Peer-to-Peer You can follow the same steps above to use Manage Registrants to send an Invitation email, or you can use the Column Browser as outlined below:

- Make sure your current event is set up and ready to go.
- Go to the Column Browser in the past event.
- Select Walkers in the Show Below dropdown.
- Check the checkbox next to the people you'd like to invite on the bottom of the Column Browser, or check all of a particular registration kind by checking the box at the top of that column.
- Select Send Invitation in the Action pulldown.
- Choose the current event you'd like to invite them to.
- Click Go.
- The Send New Invitation screen will appear. The available email addresses of the checked registrants from your past event will populate the top text box.
- Complete the Invitation by adding a personalized message, if desired.
- Preview the email to make sure you see the upcoming Event Details and graphics. Changes to your Event Details, such as date, time, and contact information can be made in Event Setup > Event Details. Other changes can be made by clicking the Customize Email Template link to go to the Invitation Template. If your personalized message does not appear, make sure that your %InviteNote% variable is on the top of your email template for the new event.
- Click Send Invitations.